![]() +1 929-458-6213
+1 929-458-6213
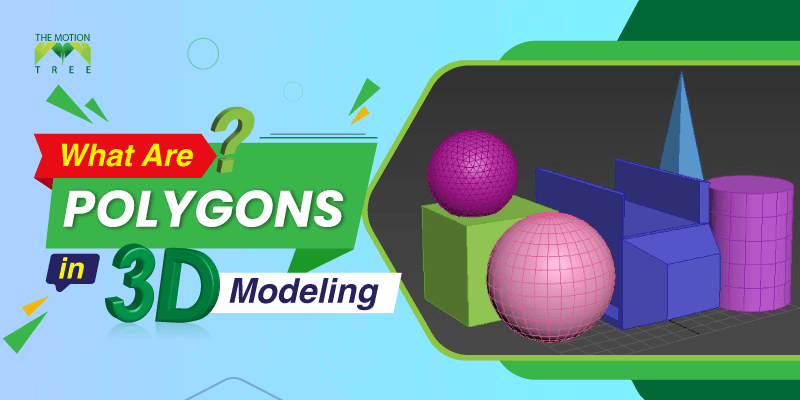
As an animator or designer, you’d definitely want to come up with 3D models that are unique and enticing. And to take you close to your dream models, polygon modeling can be a great pick!
There are so many depths to this form that even the pro artists sometimes can feel intimidated to implement it. But don’t worry, as we’ll break down what are polygons in 3D modeling in terms of units, techniques, and ideal use.
The polygons are nothing but foundations or primary geometric forms that shape the 3D models. The polygonal models help to increase resolution in the final model. However, they do have their limitations which you can alter. For that, we’ll lay down the limitations as well.
Table of Contents
ToggleWhat Are Polygons in 3D Modeling?
Polygons are the geometrical foundations or forms of 3D models. To build detailed 3D objects, designers start with polygons or shapes like cubes, cylinders, spheres, etc.
As they are easily modifiable, CG artists and animators often use this to deform and form their 3D digital objects.
Usually, polygons can be three-sided or four-sided. The tris or triangular polygon models are famous for making gaming models.
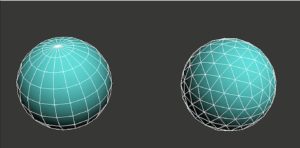
Whereas for organic modeling, artists start with quads or four-sided polygons. The 3D models built from polygon shapes are poly meshes. The total polygons used in the models are poly-count. And their density is resolution.
What Are the Basic Components of 3D Polygon Modelling?
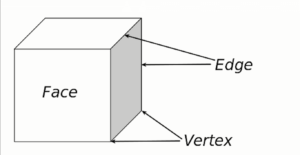
Polygons do have units to work with. Together, several units, such as face, edge, and vertices, make a polygon. And you can refer to them as the basic components. Here is a brief overview of these –
Face
Polygonal models have different geometric faces. With a single set or multiple fronts, you can make the surface of a 3D model. Every polygon mesh has a face. Therefore, experts refer to meshes as faceted.
Edges
The side of the two connected faces is the edge. Wherever the faces meet, there are edges.
When two faces join together, the edges remain in one dimension. As a result, in the finished model or workpiece, you won’t be able to notice these, even after rendering.
Vertices
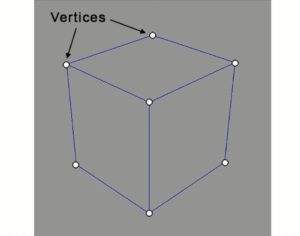
Vertex is the side where two or three edges meet. And when you have more than one vertex from the intersection of multiple edges, they are vertices. To alter the shape of the polygonal meshes, you need to modify the XYZ axes of vertices.
Advantages of Polygon 3D Modeling
You will likely use different 3D modeling forms as a digital designer or animator. If you want to explore polygons, ensure they suit your purpose and preferences. Thereby, go through some of its benefits and drawbacks:
Advantages:
Polygon models are beginner–friendly and easy to modify. Here are the advantages in detail:
Easy to Render and Use
3D polygon modeling is compatible with most high-end computers. Therefore, you won’t have to modify the PC specifications to use it. And polygons are easy to visualize in the modeling software.
Furthermore, it helps to generate images from shapes through rasterization or image-converting processes. If you want to figure out the value of the pixels, poly models help as they are linear. You need to find the value of one pixel and the triangle slope to add/sum up the value of other pixels.
Explore New Designs
3D artists can have creative freedom with 3D polygon models. Because their basic components, like face, edge, and vertices, are easy to alter.
And with slight modifications in the units, you can develop unique designs and new shapes. This is the reason why polygonal models are famous in the animated film industry to explore creative designs with inanimate and animate objects.
Implementing it is easy-peasy. You will have to connect multiple polygon faces to create the mesh and build unique models from it!
Animation is Easier
Even novice artists can animate almost like a pro with this form. Because, unlike other forms, polygonal models don’t have larger components or units.
Generally, polygon faces in 3D models only contain three to four vertices. So, if you ever want to deform the model you have created, you can quickly do so due to the smaller units. Also, to make a model more detailed and attractive, designers prefer starting with four-sided polygons.
Disadvantages of Polygon 3D Modeling
Working with polygons has a few drawbacks alongside its benefits. So, if you don’t want to take any risk with your project, go through these disadvantages:
Geometric Errors
Workpieces made with polygonal meshes are only sometimes accurate in terms of smoothness. Sometimes, a little wrong step can cause holes in the polygonal surfaces.
Polygon patches mightn’t link together as they should. So, you will notice gaps in their intersection. However, it is possible to fill the gaps.
Require Specific Resolution
For the triangle, object, and resolution count, there are maximum restriction guidelines. If you want to go beyond that limit, the performance of the animated objects will need to be better.
The maximum size of textures for importing 3D polygonal objects without sacrificing quality is 1024 px X 1024 px. If the texture is higher than this, the resolution will decrease, and the models will lose the detailing.
And in a scene, you can only add 50 objects at most to maintain the flow of the animation.
What Are the Different Polygon Modeling Techniques for 3D Models?
There are three different techniques for 3D polygon modeling. Based on the purpose of the workpiece or model the animators or designers develop, they use these varieties as described below:
Chamfers or Bevels
To sharpen the edges of the 3D models, designers prefer chamfer or beveling. Though they aren’t the same techniques, they are similar. They both aid in connecting two objects with angled faces between the 3D structure’s adjacent faces.
To make the models more appealing and sharped in the edges, especially for the glass industry, chamfering is better. In terms of better binding and joining of the model surfaces, beveling works effectively.
With beveling, modelers can modify the 90 degrees of polygon edges into 45-degree angles. This video might help you differentiate between these two:
Uniformed and Selective Subdivision
Before making the actual 3D model, 3D artists start by creating a cage model or basic geometrical shapes such as spheres, cubes, cylinders, triangles, etc. And these shapes are low in resolution, especially around the edges.
So, they subdivide the models into small units to smoothen them. The subdivided units get higher resolution. And this technique increases the vertices in the cage model that lead to a smoother workpiece surface.
Indeed, there are two types of subdivisions: uniform and selective. In order to subdivide the whole surface of the basic shape or model, you can use the uniform method. It will create four faces in the polygon face, especially in linear scales.
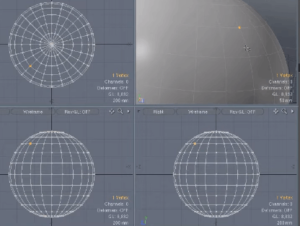
The selective subdivision is better for adding detail to the models, such as lips, eyes, and tree leaves. It selects certain parts of the surface to give layers more information.
Also, you can combine both methods to leave the surface edges sharp without sharpening them. This technique builds 3D objects with smoother surfaces and textures.

Extrusion

To shape the polygon faces and edges, extrusion comes in handy! In fact, it helps to modify the faces outward and within.
With this tool in 3D polygon modeling software, you can copy or create similar faces from single or multiple faces. Artists can apply this technique to replicate edges with polygonal faces and extrude cube shapes, including table or house models.
Related Posts

