
Merging meshes in Blender is one of the everyday tasks you would ever undertake as a 3D artist. Further, many people do not even know how to merge meshes in Blender correctly. To avoid any issues, follow our given tutorial and go through each step.
You could merge meshes using different types of methods. Each one is straightforward to go upon. The mesh object would join up with a few simple steps, giving you a great-looking shape. Either way, it’s a great process to follow, and you should check it out for sure.
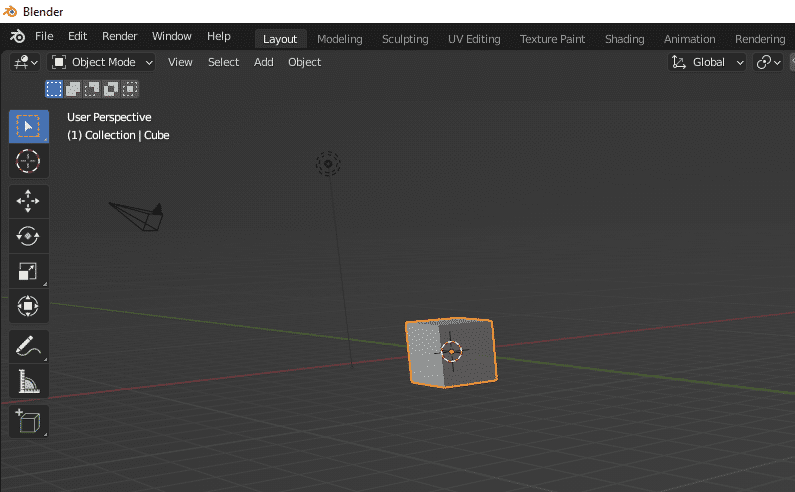
In Blender, the mesh represents a structure consisting of vertices, edges, and faces. Altogether represents a mesh object in Blender. Most of the time, you can edit meshes in object mode. Further, working with meshes requires proper concentration.
Precise selection of meshes can help you get better at creating new shapes.
When comparing objects, meshes are way simpler. In general, meshes only define a specific area and volume in 3D space. On the other hand, objects can contain multiple characteristics and elements linked to them, which is why meshes in Blender are different from objects.
Merging meshes in Blender takes a few simple steps. With these easy steps, you could combine and join different meshes into one. So let’s get started with the steps in Blender to merge meshes one by one.
Step 1: First, open the Blender software.
Step 2: Afterward, go into the Blender file you want to edit. Or start creating meshes within the current document.
Step 3: Now, select an object within Object mode. Once you select a single object in Blender, press “Shift” on the Keyboard and select the other objects.
Step 4: After you select multiple objects in Blender, go into the Object menu located at the top-left side of the interface. Afterward, select Join from the menu.
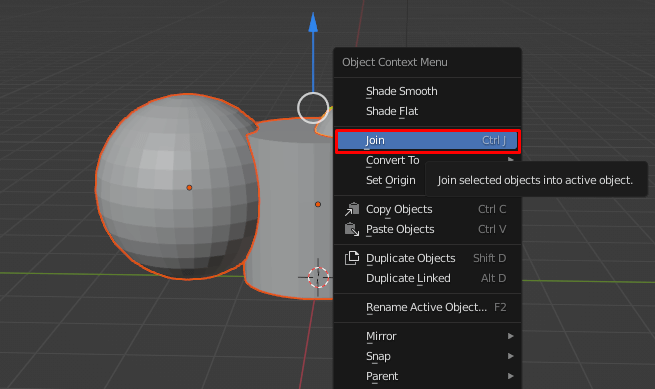
Note: Instead of going into the menu, you could use Ctrl + J to join two different meshes.
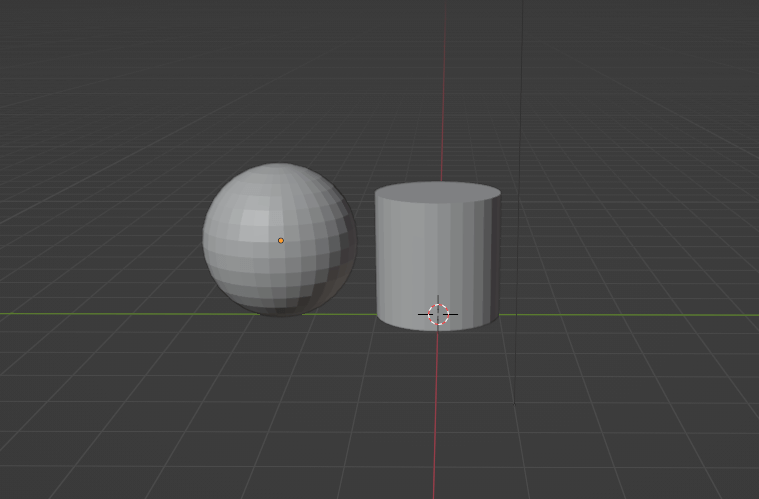
The following tutorial will join the following set of meshes into one object. Further, it’s better to remember that the join command only works for mesh-based objects. Blender can’t join objects from different materials, which is why you should be careful while applying the Join function to other types of objects.
Read More: Making Textures for 3D Models
Let’s get into the process of merging meshes with edge-connected features of Blender. It would help you connect two different meshes and make them unified. It’s one of the lesser-known yet effective processes to go on. So let’s start the process right now.
Step 1: First, open your blender file and put the mesh object side by side.

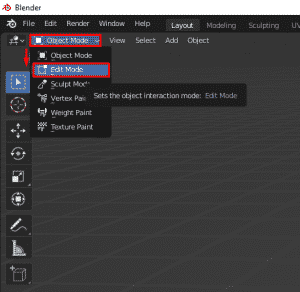
Step 2: Afterward, go into the “Edit Mode” within Blender.
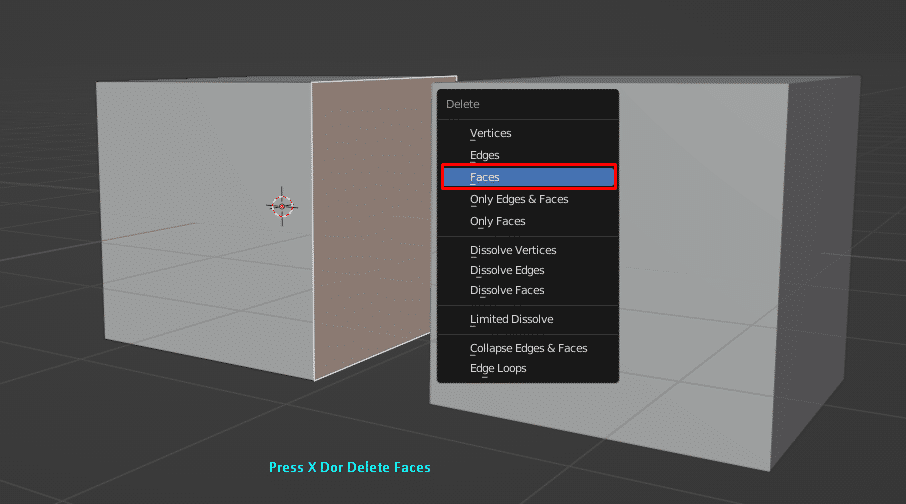
Afterward, go into the select face mode and delete the two facing faces of both objects. First, select the faces > press “X”> Delete Faces.
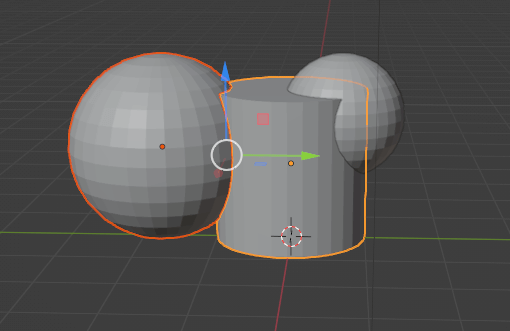
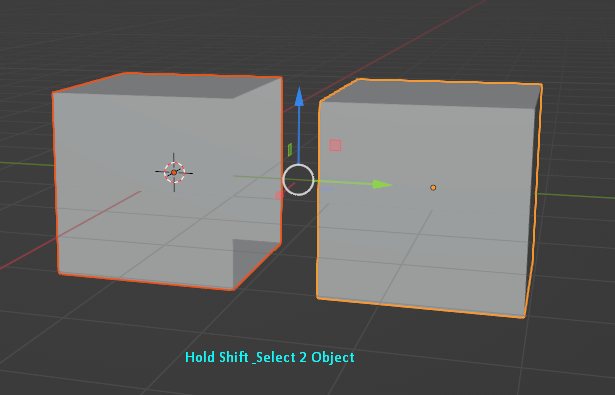
Step 3: Now, go into the object model within Blender. Select the first object and select the second one while pressing “Shift” on the Keyboard.
Step 4: Go into the Object menu > Join to make both meshes into one object.

Step 5: Go back into the Edit mode at the following step. Afterward, select the edges of both of the facing edges. Then, select “New Face from Edges.”
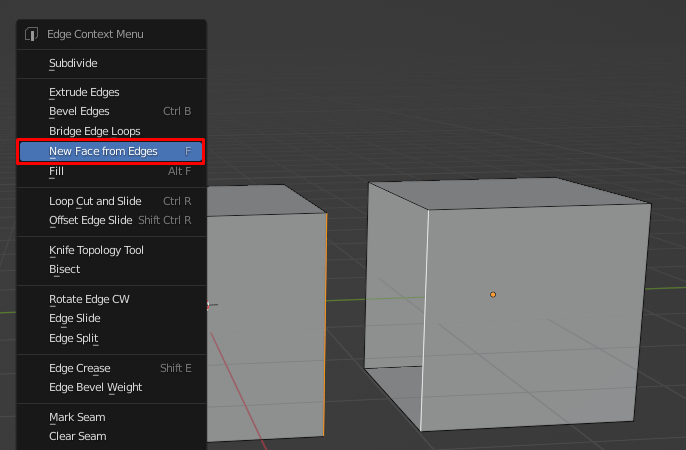
Note: You could press “F” after selecting all the edges. Blender joins faces more simply and provides you with new faces.
It’s better to mention that selecting all of the edges and creating faces could eliminate intersections between them. If you want to create edges at the new faces, select one edge from both meshes and create a new face. Then, do it for the rest of the edges. But in these cases, you need to have equal edges on both of the objects.
Related: How To Merge Objects In Blender
You have a few options to split merged meshes with Blender. Let’s explore them right now.
To split merged meshes in Blender, you could use Ctrl + Z to activate the undo feature. Even if the Blender Undo function does not activate, you could use Ctrl + Shift + Z to get back to the previous step. But sometimes, the undo function is not enough to split merged meshes, which is why you should take another approach.
You could use the separate option to make a certain part of the meshes. First, select the mesh object and parts that you want to separate. Afterward, go into the Object > Separate > [option].
On the other hand, if you create a vertex group while merging the meshes, you could later separate it with Mesh > Separate > [option]. First, however, you could press “P” on the Keyboard as a shortcut to the Separate feature.
Let’s explore the questions for merging meshes in Blender. These are some of the most asked questions for merging meshes.
Grouping objects takes only two steps in Blender. First, select all the objects you want to group into. Then, while selecting multiple objects, make sure to press Shift on the Keyboard. Afterward, you need to right-click on the selected object group. Then press “M” and choose New Collection to create a new set of collections.
Creating a vertex with Blender is a lot easier with only a few clicks. First, you need to click on the object in Blender. Afterward, go into the object data tab. Then expand the vertex group selection, and you would get an empty list on the screen. Finally, you only have to click on the plus sign to add the vertex group. And you would get the vertex group.
To select multiple objects in Blender, first, you need to check if everything is visible with Ctrl + H. It would make visible every object available on the scene. Afterward, press A on the Keyboard to select everything in the following scene in Blender. To deselect everything, you only need to press A twice.
Learning how to merge meshes in Blender is helpful for anyone working on 3D projects. However, as a professional or beginner, you need to understand how to work with mesh objects. Creating unique shapes is a lot easier with a better understanding of meshes.
Blender works as a great free platform for anyone to create fantastic 3D models, animation, VFX, and so on. Thus, meshes are the core of almost every structure, and learning them is a must, which is why you need to learn the basics of mesh jointing and splitting.
1
2
3
April 7, 2026
6
April 3, 2026
7
April 3, 2026
8
10
April 3, 2026
